Troubleshooting: Why Do My Scanned Negatives Stay Negative? #
A common issue when scanning negative film is that while the preview image in SilverFast looks perfectly converted into a positive, the final saved file on your computer remains a dark, orange-masked negative.
This guide explains why this happens and how to easily adjust your settings to get properly converted positive images.
Section 1: The Role of HDR Mode in SilverFast #
The primary reason negatives do not transform into positives in your final saved file is that your software is set to HDR (High Dynamic Range) mode.
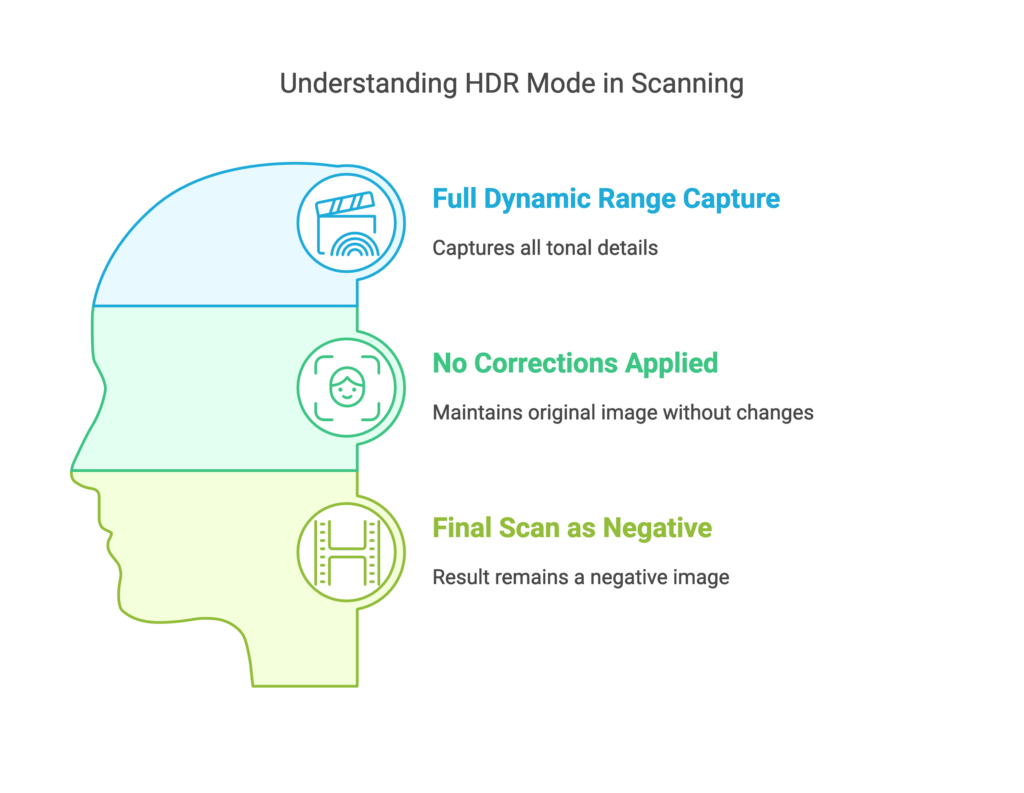
In SilverFast, HDR formats (such as 64-bit HDRi or 48-bit HDR) are raw data formats. They are designed to act like a digital camera’s RAW file, capturing the maximum amount of light and color data directly from the scanner sensor without applying any processing, color corrections, or negative-to-positive inversions.
Section 2: HDR Mode vs. Non-HDR Mode #
To understand which mode fits your workflow, compare how they handle your film:
| Scanning Mode | What It Does | Final Saved Image | Best Used For |
|---|---|---|---|
| HDR Mode | Captures the raw, full dynamic range of the film. No color, gamma, or inversion corrections are applied. | Remains a Negative (unconverted raw file) | Archiving raw data to edit later in SilverFast HDR Studio. |
| Non-HDR Mode | Applies color, contrast, and density corrections (using NegaFix) during the scan. | Transformed into a Positive | Standard workflows where you want ready-to-use positive images immediately. |
Section 3: Why Does the Preview Look Positive if the Final Scan is Negative? #
While you are in HDR mode, SilverFast still shows you a converted positive preview on your screen. This is simply a visual aid to help you frame and inspect your image.
Because HDR mode’s purpose is to preserve the raw, unedited data for post-processing, the software intentionally strips away the positive preview adjustments when it saves the final file to your hard drive. The positive-to-negative transformation is bypassed to keep the raw data pure.
Section 4: How to Correctly Scan and Convert Negatives to Positives #
If you want SilverFast to automatically convert your negatives into positive images during the scan, you need to switch to a non-HDR color depth:
Step 1: Change Your Scan Mode #
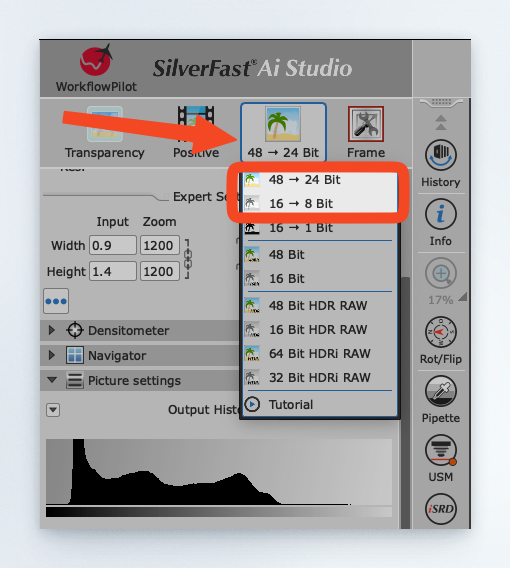
In the SilverFast control panel, change your output format from an HDR raw format to a standard processed format:
- Select 48->24bit Color (for color negatives)
- Select 16->8bit Grayscale (for black-and-white negatives)
Step 2: Ensure “Negative” is Selected #
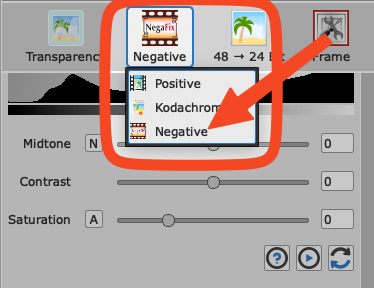
Make sure your media type is set to Negative in the main settings.
Step 3: Use the NegaFix Tool #
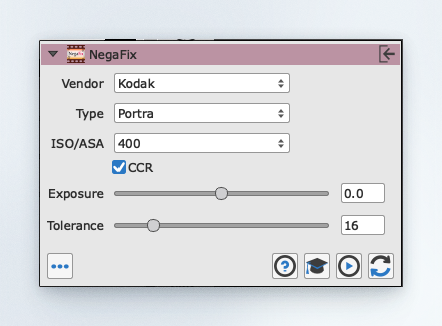
Once a non-HDR format is selected, the NegaFix dialog will appear. Select your specific film manufacturer, film type, and ISO speed. This ensures the orange mask is perfectly calibrated and removed.
Step 4: Scan and Save #
Click Scan. SilverFast will now bake the NegaFix inversion and color corrections directly into the final image, saving it as a fully converted positive file.


