The Issue: Preview Shows a Cropped or “Square” Image #
If you find that SilverFast is not previewing or scanning your entire slide, but is instead cutting off the sides and displaying only a cropped, squarish portion of your photo, the issue is almost always caused by how the slide is physically oriented inside your Nikon adapter.
Because of the physical design of the MA-20 and MA-21 adapters, slides must be inserted in a specific direction to allow the scanner’s sensor to capture the full 35mm frame.
How to Position Your Slide Correctly (Physical Hardware) #
To resolve this issue, check the physical orientation of the slide before pushing it into the adapter slot:
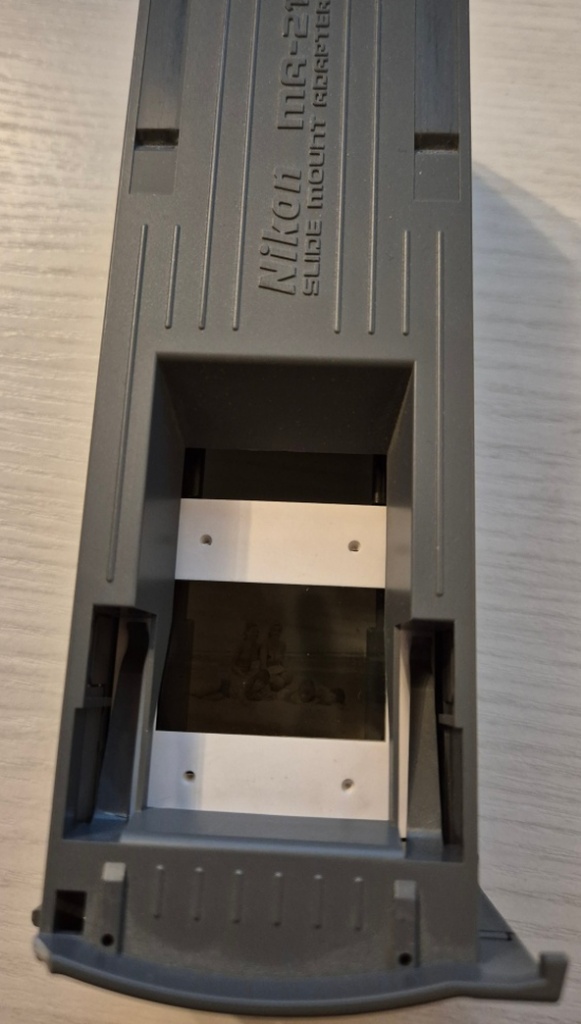
✅ Correct Orientation (Full Scan Possible) #
The slide must be inserted with its short side facing down (vertical/portrait orientation relative to the adapter). This allows the scanner to read the entire width of the film.
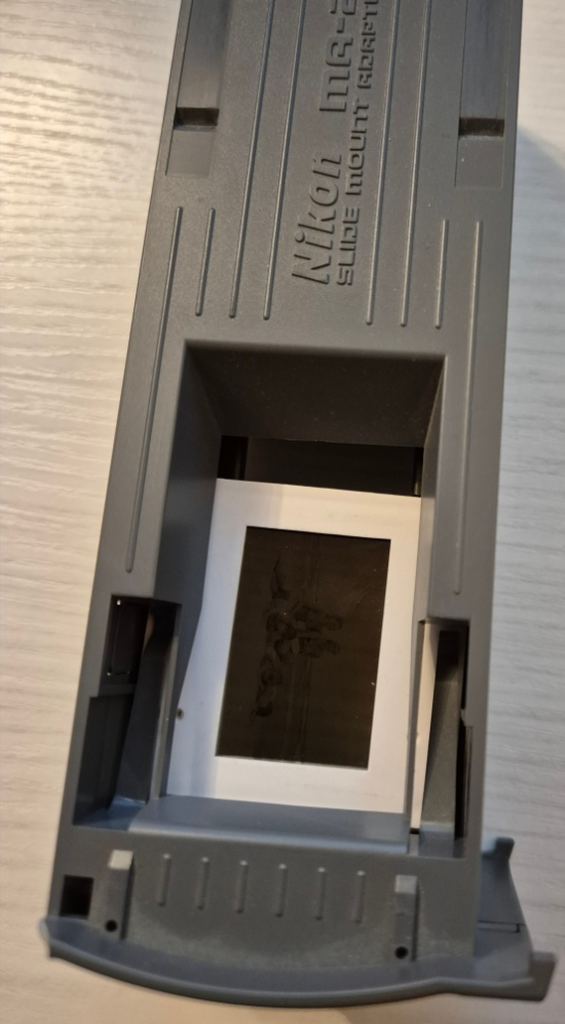
❌ Incorrect Orientation (Borders Cut Off) #
If you insert the slide with the long side facing down (horizontal/landscape orientation relative to the adapter), the edges of your image will physically block the scanner’s light path, cutting off both of the long borders.
How to Fix the Image Orientation in SilverFast (Software) #
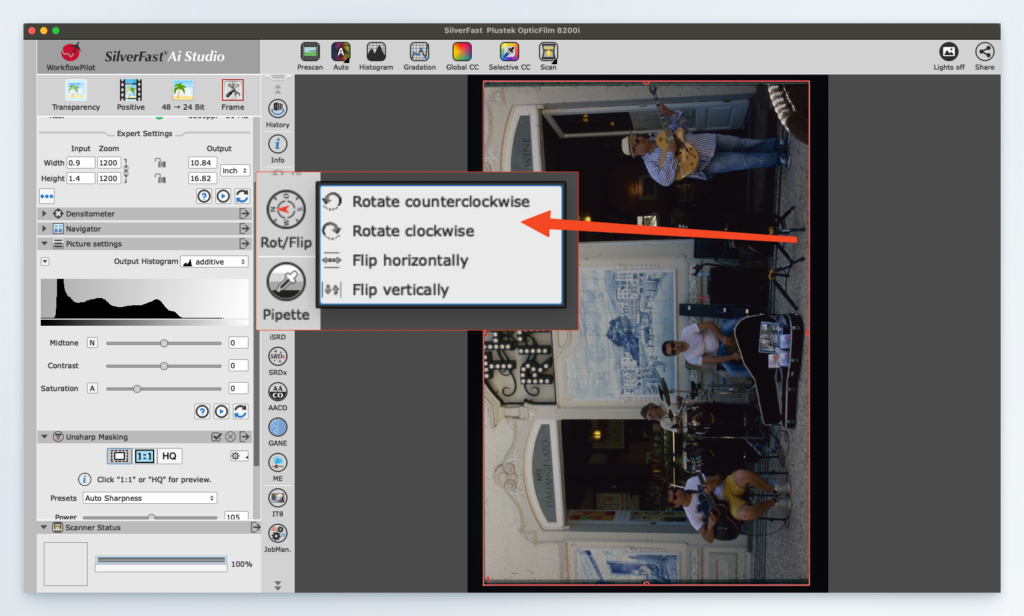
Inserting a landscape-oriented photo vertically will result in your preview image appearing sideways in SilverFast. Do not worry—this is the correct way to scan it.
To rotate the image so it looks correct on your screen:
- Complete your preview scan.
- Use the Orientation Tool (the rotation/mirroring buttons) in the SilverFast toolbar to rotate the image 90 degrees digitally.
- This ensures you get a full-frame scan without losing any of your image borders, while still saving the final file in its correct orientation.