Many high-quality scanners, including both flatbed and dedicated film scanners, have the ability to adjust the focus of the optics. This allows the scanner to offset the focus up or down by several millimeters from the regular focus level. Some scanners have automatic focus control, while others also allow the user to manually set the focus.
Using the Focus Control feature in SilverFast can help ensure you get crisp, sharp scans – even with materials that don't lie perfectly flat on the scanner.
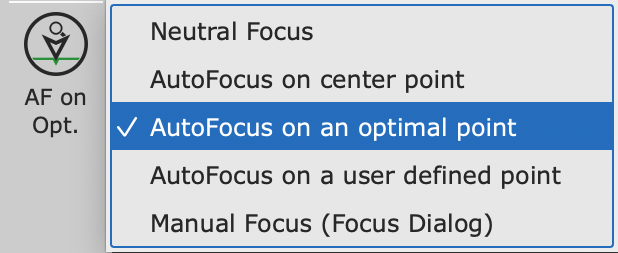
Focus Control Options in SilverFast
#
| Neutral Focus | Turns off focus control, scans at default focus level |
| AutoFocus on center point | Automatically sets the focus point to the center of the scan frame, then adjusts the focus offset before scanning |
| AutoFocus on a user defined point | Allows you to manually set the focus point by clicking inside the scan frame |
| Manual Focus (Focus Dialog) | Lets you manually adjust the focus offset using a preview dialog and slider |
#
#
To use the Focus Control feature in SilverFast:
#
- Open your SilverFast software and deactivate the WorkflowPilot if it is enabled.
- Look for the Focus Control button at the bottom of the vertical toolbar.
- Choose your desired focus control mode from the options listed above.
- If using “Pick AF point” or “Manual Focus”, click inside the scan frame to set the focus point.
- Review the focus preview and adjust the offset as needed before scanning.

The Focus Control feature is only available for scanners that have motorized focus adjustment capabilities. Be sure to check the list of compatible scanners at the end of this article.
Using SilverFast's powerful Focus Control tools can help you get the sharpest possible scans, even from challenging 3D objects or film materials that don't lie perfectly flat. With a few clicks, you can easily optimize the focus and capture crisp, high-quality digital images.


